Check out our White Paper Series!
A complete library of helpful advice and survival guides for every aspect of system monitoring and control.
1-800-693-0351
Have a specific question? Ask our team of expert engineers and get a specific answer!
Sign up for the next DPS Factory Training!
Whether you're new to our equipment or you've used it for years, DPS factory training is the best way to get more from your monitoring.
Reserve Your Seat TodayRecently we've been getting some questions about how to easily remote monitor the temperature in server rooms. Many clients (and future clients) ask us for remote monitoring solutions that will allow them to properly keep an eye on the temperature as well as on the humidity conditions.
"I need to make sure my server room is cool at all times. What kind of system would you recommend so I can remotely access my network and receive alerts from it?"
We have the perfect network monitoring solution to manage your server room temperature monitoring. This solution can easily be installed and configured to send you and your team notifications with temperature and other environmental levels go outside the ideal range.
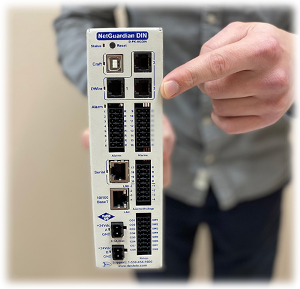
For this remote monitoring solution, you'll need:
This system will send you alerts when environmental sensors pick up any condition above (or below) your desired thresholds. In this article, we'll go over how you can quickly set up your remote monitoring solution.
There are many different temperature and humidity sensors on the market. Most of them will be a good option if you don't have several pieces of equipment spread out across your building.
If you do, there are many options of what you can do, but the best practice is to deploy only one RTU with sensors that have the plug 'n' play functionality. This way, you can connect multiple sensors to a single RTU and get your entire site covered. This is a cost-effective option that lets you remotely monitor your whole facility with only a few devices.
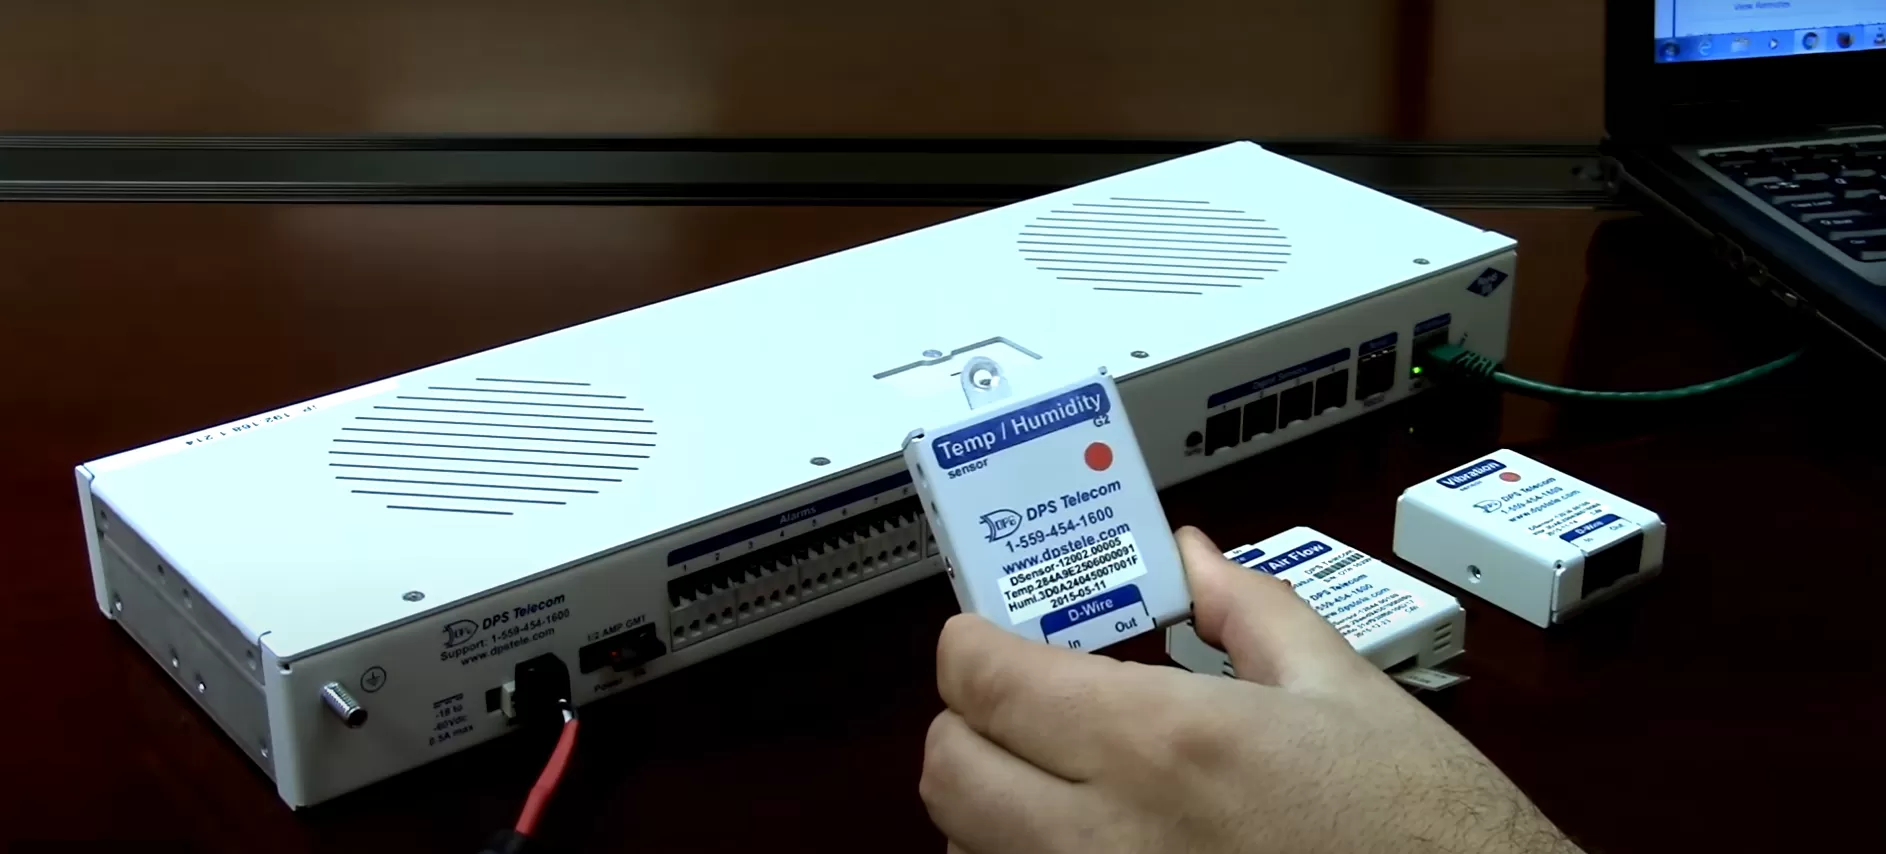
Our D-Wire sensors can be daisy-chained together which makes remote monitoring your site an easy task, allowing you to achieve complete visibility over all your server room. With daisy-chained D-Wire sensors, you won't have to worry about the analog capacity on your RTU, tangled messes of cables, or even the trouble of wiring analog connectors.
Using simple RJ-11 connectors, in and out, you can chain up to 16 sensors to a single DPS RTU's D-Wire port. Your sensor chain can be a maximum of 600 feet, this means that you can run sensors out as far as you need to monitor your devices, with no need to place various analog-capable RTUs in multiple places.
Some of the D-Wire sensors available include:
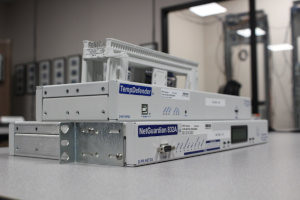
You need a compact, simple, and efficient RTU that features a D-Wire port to help you monitor the temperature readings inside your server room. That's where the TempDefender comes in. The TempDefender is a small device that will keep a close eye on all the environmental conditions that affect the mission-critical network in your facility.
This RTU features 8 discrete alarms on its back panel that are used to monitor dry contacts, such as motion sensors, UPS, smoke detectors, flood sensors, AC, and room entry. The TempDefender also has a dense analog coverage with support for up to 32 D-Wire sensors and 8 analog channels.
Also, with the built-in (and easy-to-navigate) web interface, you can log on to the RTU from anywhere you are to edit your thresholds settings and view the current status of the room. Do you want to know what's the current temperature? What about the last someone entered the room? You can have all of this information right from your network PC.
You don't have to wait until your AC unit fails and the equipment in your server room overheats to know that something is wrong. This 1RU RTU alerts you of changing conditions 24/7/365 through whatever method is best for you (text message, email, etc.). The TempDefender is a cost-effective way to proactively monitor your vital network equipment.
Now that you know why D-Wire sensors and the TempDefender form a competent monitoring system, let's take a look at how you can perform the hardware installation for the D-Wire sensors.
Connecting directly to the TempDefender:
Use standard CAT5E, straight-through RJ-11 or RJ-12 cable. Connect "In" jack on the temp sensor to the D-Wire or Digital Sensor input on your RTU.
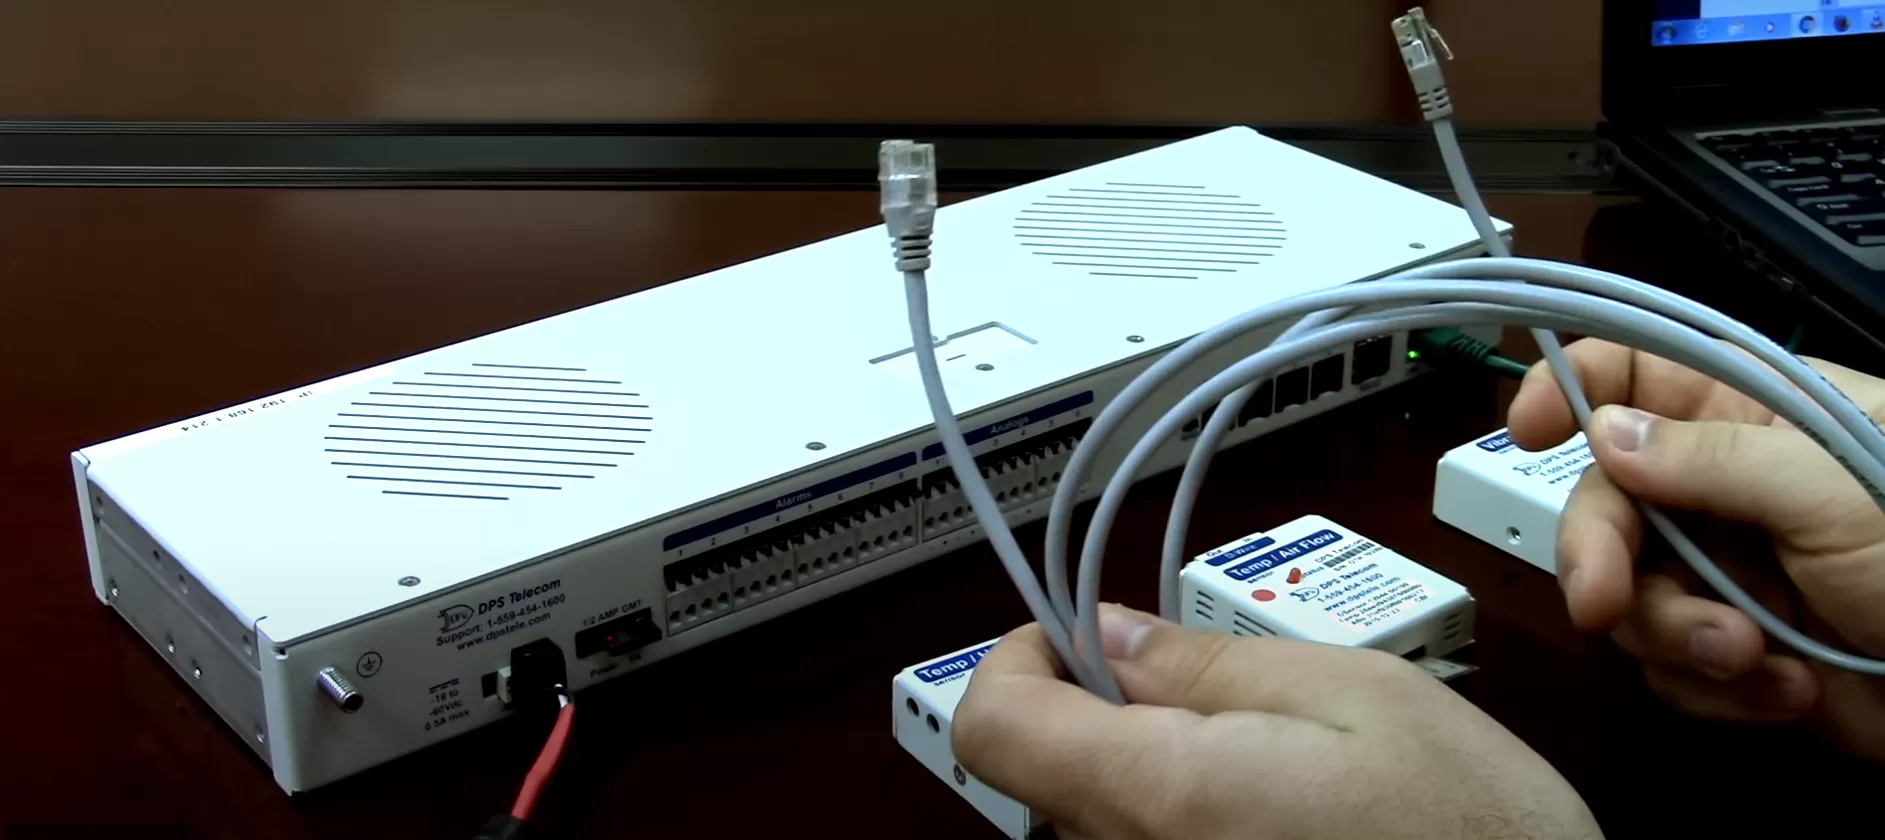
If connecting to an existing chain of sensors:
Connect the "In" jack on the temp sensor of the "Out" jack on the previous sensor in the chain.

After the hardware installation, it's time for the software configuration of the D-Wire sensors in your TempDefender.
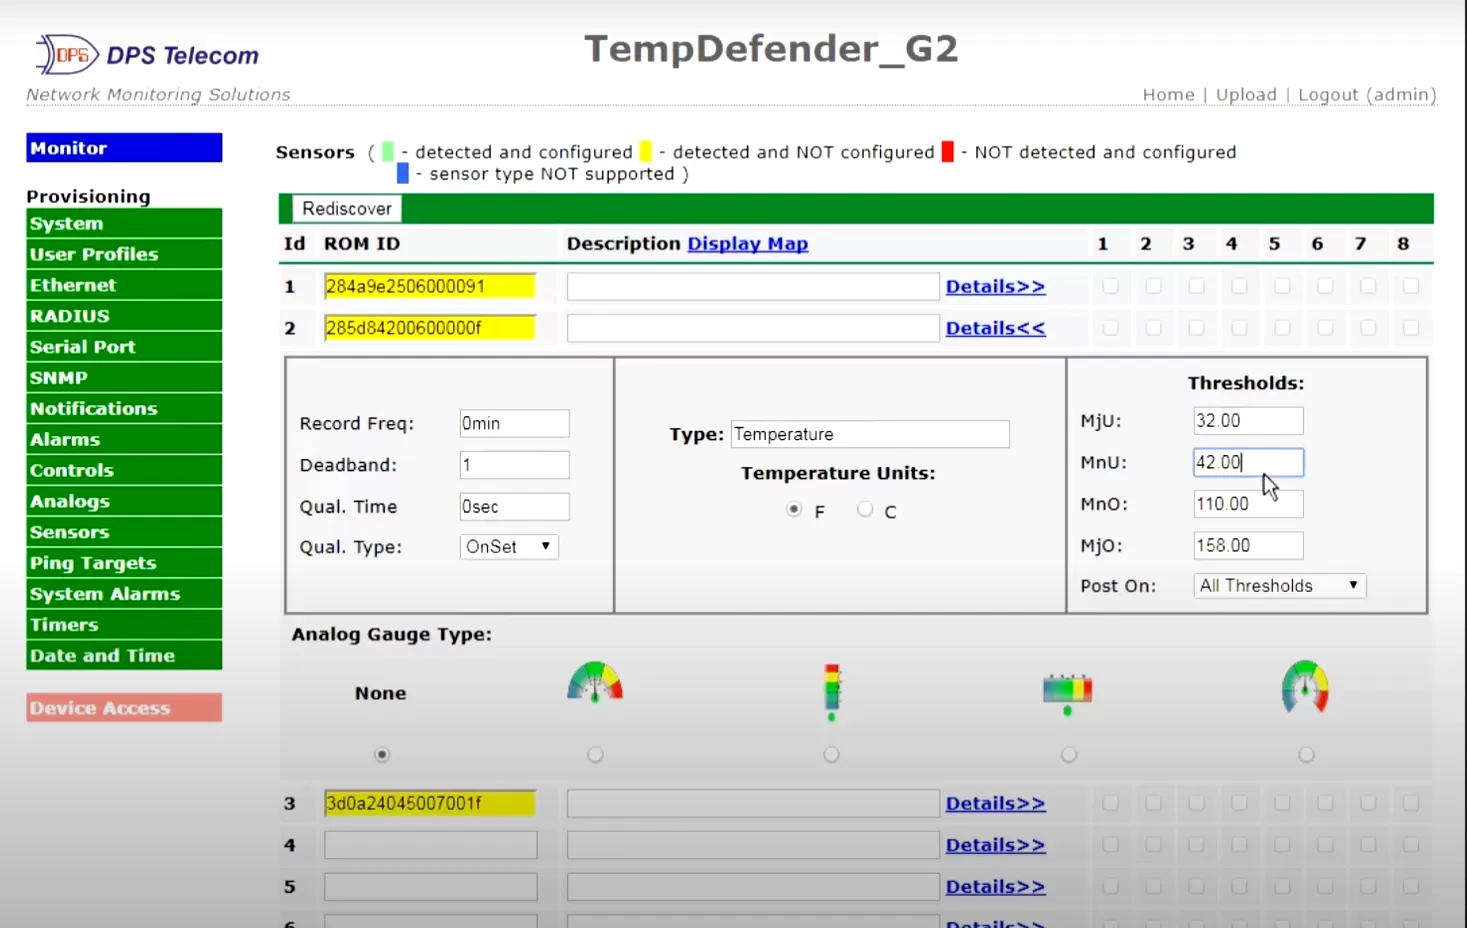
It's very simple and quick to set up a whole room's worth of sensors in the web interface of your TempDefender. Every time you plug a sensor in, the sensor type is automatically detected, and default scaling and alarm thresholds are applied. You can easily adjust each setting to suit your needs and configure alarms and alerts on a per-sensor basis.
Here's your step-by-step:
Your sensors are now configured.
Note: The Monitor section provides the measurements of each sensor. The Monitor >>Sensors screen provides a description of each sensor, the current reading, the units being read, and the alarm conditions (major under, minor under, major over, minor over) according to your software configuration.
In small networks, there is just a handful of RTUs. So, it's not complicated to keep up with their separate screens.
However, if you have a larger network, with more than a handful of RTUs, it becomes more and more complicated to manage separate devices and screens, as well as the alarm notifications coming in from each one of your RTUs.
If you have a medium or large network, it's important that you can consolidate all your devices into a single interface that will allow you to monitor and control your equipment using only one screen. That's what a master station is.
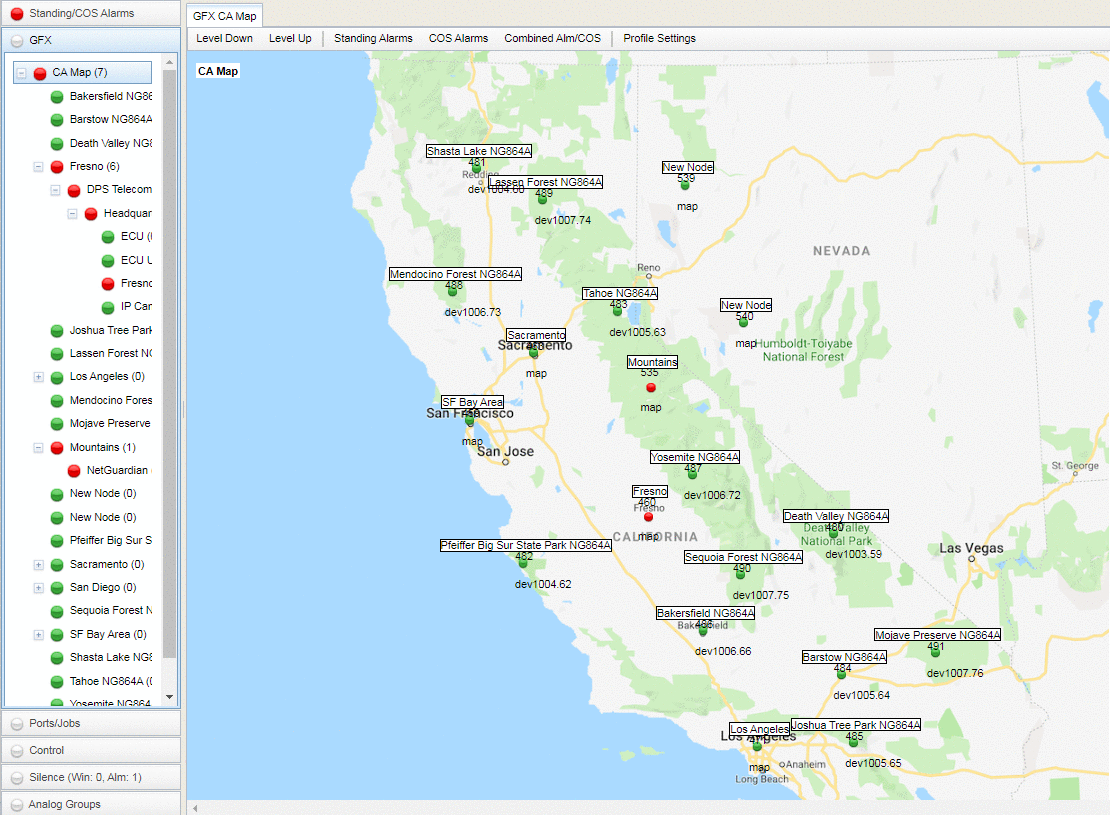
The T/Mon LNX master station enables you to reduce costs by giving you complete visibility over all your equipment at all your remote sites (doesn't matter how many you might have). It monitors, manages, and automatically sends detailed notifications about alarms in over 25 communication protocols.
T/Mon also presents your real-time data in an easy-to-understand graphical format. This enables you to have a visual representation of your managed network on layered geographic maps. From a regional area map, you can drill down to cities, to server rooms, to photographs of individual equipment.
T/Mon's features will provide you with a "war room" view of your alarms right down to the network devices themselves, allowing you to respond to alarms in a timely manner.
Deploying a remote monitoring system is the industry's best practice for keeping your important gear stored in a server room safe from the elements and other conditions that might affect it.
And, as you could see, it's very simple to set up this server room temperature monitoring solution. This way, you can get notified when temperature and other environmental levels rise or fall outside your preferred thresholds.
Most of our clients treat us as their own personal engineering department and ask us to teak our solutions to better fit their needs. And, that's what we do best. From design to production, all of our devices are built in-house, so whatever your requirements are, we can work with you to help you achieve a perfect-fit solution.
To know more about the temperature monitoring system described here, or if you a custom solution for your unique network, just reach out to us.

Morgana Siggins
Morgana Siggins is a marketing writer, content creator, and documentation specialist at DPS Telecom. She has created over 200 blog articles and videos sharing her years of experience in the remote monitoring industry.