Check out our White Paper Series!
A complete library of helpful advice and survival guides for every aspect of system monitoring and control.
1-800-693-0351
Have a specific question? Ask our team of expert engineers and get a specific answer!
Sign up for the next DPS Factory Training!
Whether you're new to our equipment or you've used it for years, DPS factory training is the best way to get more from your monitoring.
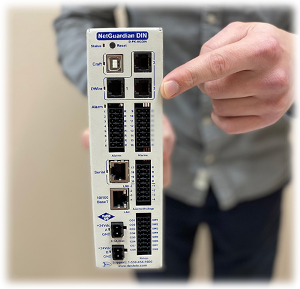
Reserve Your Seat TodayIn network monitoring, notifications are critical. The point of monitoring is to know what is happening so you can respond to it and resolve any issues that occur. Our DPS equipment is designed to be flexible and meet your needs, so we have many different types of notifications at your disposal. This article will cover how to set up our many different notifications so you will be alerted to changing conditions.
All DPS notifications can be configured from the Edit -> Notification menu. If your web interface has a white background, keep reading, it's on the DSTni platform. If your web interface has a gray background, you will want to read our other article here.
The first notification type we are going to cover is email notifications. These are the most common notification and also the easiest to set up. In order to send an email notification, both the name and location must be set in the System tab. This will be the address that the email shows it is coming from, e.g. "NetGuardian@DPSTele.com".

Email notification configuration.
Google has recently deprecated SSL in favor of TLS, so some google/gmail communication may no longer function as expected. This is important to keep in mind as not all devices support TLS, and may require workarounds to continue functioning.
Select "Email" as notification type, input the domain and username of your email address, and the IP address of your mail server (if you've filled out the DNS server information under Ethernet, you can use the url instead). Click submit to save your changes.
These notifications allow you to send text messages including alarm descriptions, time of occurrence, and point addresses to a pager. To set this guy up, you want to select "Alpha" as type, and input the phone number in the phone/domain text box. You'll also need to put in the PIN number in the PIN/Rcpt/Port text box. Finally, select the pager data rate and word format. The defaults are 1200 and 7, respectively.

Alpha notification configuration.
These notifications are similiar to the alphanumeric notifications, but these differ in that they only send the point numbers in the format "[IP] *[Display] [Address]*[State]". In order to set up these notifications, first select an ID number to use, and select "Numeric" from the dropdown textbox. Type in the phone number followed by 7 commas. Each comma after the number causes a 2 second pause, giving you enough time to answer the pager before the NetGuardian sends the alarm information. The fields for Baud/Wfmt and IP address are not used for these notifications.

Numeric notification configuration.
If your pager uses SNPP, these are the type of notifications that you want to set up. The first thing to do is select an ID number to use. Next select "SNPP" from the Type dropdown box. If login information is required, use the Phone field and use the format "username;password". They must be separated by the semicolon and no longer than 29 characters combined. Enter the numeric pager number into the PIN/Rcpt/Port text box. The last step is to put in the address of the SNPP server into the IP address textbox. The port will automatically default to port 444.

SNPP notification configuration.
This type of notification sends information including the point address, description, time of occurrence, and state of the alarm associated with the notification. These text pages can be viewed using a terminal such as HyperTerminal or PuTTY. To set up this notification type, select an ID number to use. Select "Text" as the notification type. Enter the phone number of the target device in the Phone/Domain textbox. Finally, select the pager baud rate and Word format. The defaults are 1200 and "7,E,1", Respectively.

Text notification configuration.
The SNMPv3 notification feature allows you to view alarm status from multiple SNMP managers in addition to the global managers, which are set up from the SNMP menu. Global managers provide more features, but these notifications are useful for additional SNMP notifying.

SNMP notification configuration.
To set up notifications with SNMPv1, select the ID number to use. Select "SNMPv1" from the type dropdown box. Enter the SNMP port in the PIN/Rcpt/Port section, and enter the IP address of the SNMP manager in the IPA field.
SNMP v3 is similar to v1, but has one extra step. Select the ID number to use. Select "SNMPv1" from the type dropdown box. Enter the SNMP port in the PIN/Rcpt/Port section, and enter the IP address of the SNMP manager in the IPA field. Next, go to Edit -> SNMP and configure the settings there. Set up a user name there. Enter the SNMP port in the PIN/Rcpt/Port section, and enter the IP address of the SNMP manager in the IPA field.
To test your notifications, you'll want to assign a notification to an alarm or relay, and trigger it. If you assign it to an alarm, you can reverse the polarity to cause a notification, and if you use a relay you can toggle the relay from monitor to activate the notification as well.
If you're still having difficulty getting your alarms to notify you, give us a call! We'll work with you to find a solution to get your notifications sent, as well as any issues you need resolved.

Ryan Ridley
Ryan Ridley is an Electronics Test Technician at DPS Telecom. He has worked in tech support, engineering and manufacturing. He brings over 6 years of experience working with DPS hardware and software. At DPS Telecom, Ryan is responsible for performing testing on our products to verify they work ...