"How to Install the T/Mon MySQL Agent..."
Unable to Install MySQL for T/Mon Agent?
Platform: T/Mon SQL Agent.
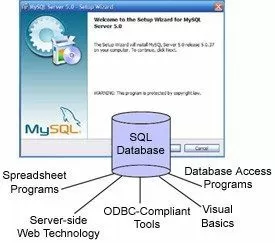
T/Mon SQL software module allows you to integrate multiple T/Mon alarm data history files into a single advanced SQL database. You can store millions of alarm events into a single SQL database.
This techno knowledge paper can help you if:
- You are attempting to Install MySQL for T/Mon SQL Agent.
Quick Reference Chart
 (for more details, review the troubleshooting checklist below.)
 Troubleshooting Checklist
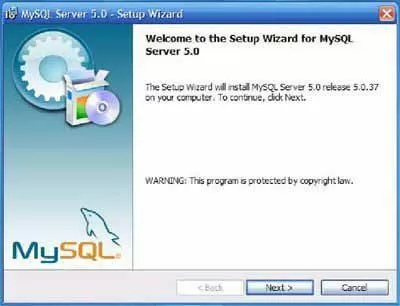
- Download or copy the MySQL installation file onto your desktop.
- Double-click the icon for MySQL installation file.
- Click 'Next' on the MySQL installation wizard welcome screen.
- Select 'Typical' installation.
- Use the Default Path.
- Click on Install.
- Click on 'Finish' after Installation.
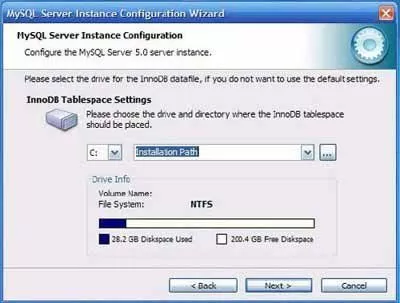
- Now, it's time to configure MySQL Server instance. Begin by selecting the 'Detailed Configuration' option.
- Select 'Developer Machine'.
- Select 'Multifunctional Database'.
- Select drive 'C:' and 'Installation Path' directory for InnoDB Tablespaces setting.
- Select 'Decision Support (DSS) OLAP'.
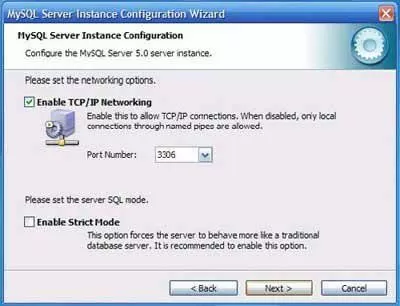
- Select 'Enable TCP/IP Networking' and de-select 'Enable Strict Mode'.
- Select 'Standard Character Set'.
- Select 'Install as Windows Service'.
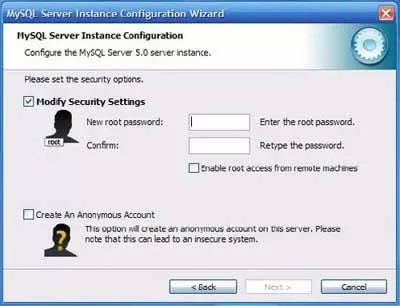
- Enter and confirm your Password.
- Select 'Enable root access from remote machines'.
- Click on 'Execute' to start configuration.
- Click on 'Finish' to close Wizard after configuration is complete.
Basic installation should now be complete. - Open up your MySQL command prompt:
- Click on 'Start' icon.
- Select 'Programs'.
- Select 'Files'.
- Select 'MySQL'.
- Select 'MySQL Server 5.0'.
- Select 'MySQL Command Line Client.
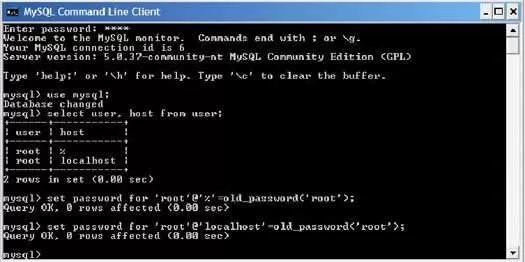
- Type your Password: root.
- Change the format of your password to root:
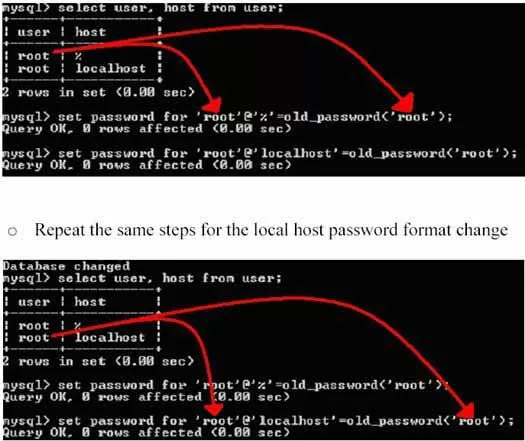
- Type use mysql and press 'Enter'.
- Type select user, host from user; and press 'Enter'.
- You should see a box like the one shown below that displays the passwords that are set for the remote password as well as the local (localhost) password.
- To set the password to the correct format, type the password found in the box and use that in the command below:
Type set password for 'root'@'%'=old_password('root'); and press 'Enter'. - The entire sequence should look very similar to the picture below:
- Install T/Mon SQL Agent.
- Go to DPS website (www.dpstele.com).
- Click on Support on bottom left hand corner.
- Log into Support account.
- Go to Firmware/Software downloads.
- Select T/Mon SQL Agent.
- Select version 1.02.0000.
- Save to desktop.
- Unzip both T/Mon SQL agent and MyODBC.
- Double click MyODBC installation.
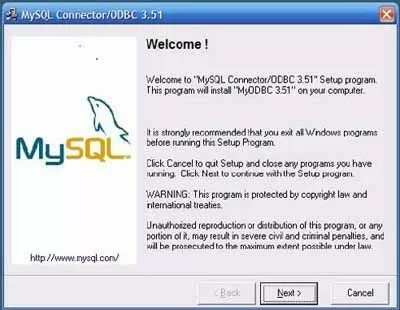
- You should see "Welcome to MyODBC" page as shown below:
- Click 'Next'.
- Click 'Next' to agree to the terms.
- Click 'Next' the read me statement.
- Click 'Next' to start installation.
- Click 'Next' to finish OBDC installation.
- Install T/Mon SQL Agent.
- Click on 'Installation Program'.
- Click 'Next' for InstallShield Wizard.
- Select 'I accept the terms to the license agreement'.
- Click 'Next'.
- Fill in customer information.
- Select 'Typical Installation'.
- Click on 'Next'.
- Click on 'Install'.
- Click on 'Finish'.
- Create database on machine running MySQL.
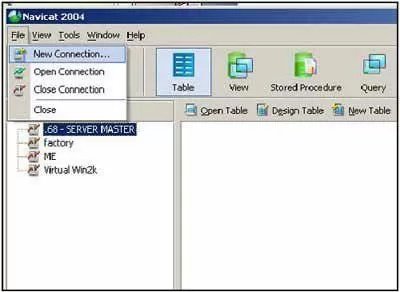
- Launch MySQL administrative tool (Navicat).
- Click on 'Start' icon.
- Select 'Programs'.
- Select 'Administrative Tool' (Premium Navicat).
- Go to 'File' > 'New Connection'.
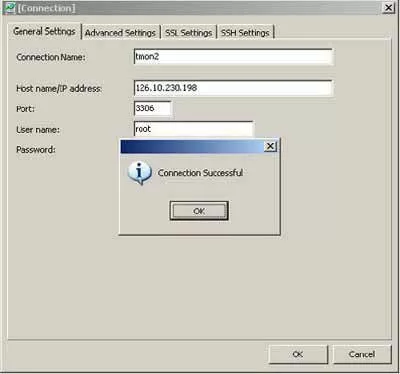
- Fill in the Name, IP information and Password of the machine that will be running MySQL.
- Click 'OK' for Test Connection.
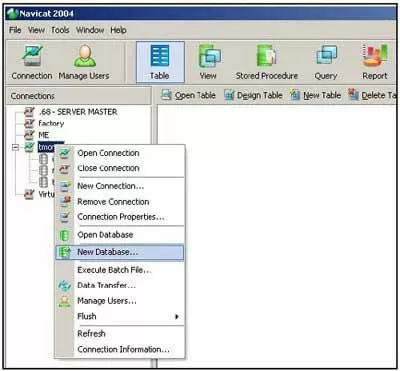
- Go to 'Connection' box.
- Click on the server that you defined in the previous step.
- Right click this server connection and select new database.
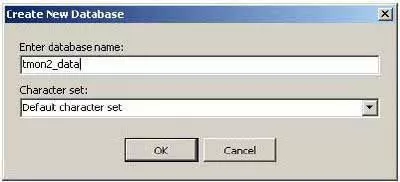
- Fill in the database name you will be using (for example tmon2_data).
- Click on database name in connections box (tmon2_data) to view database history.
- Setup the T/Mon for an SQL job and setup the DPS SQL Agent.
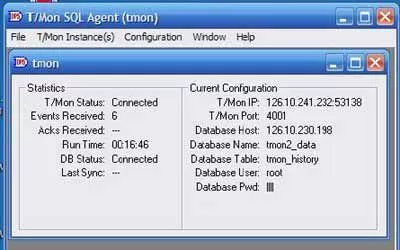
- Launch DPS SQL Agent to see connection status for the T/Mon and database.
If you experience any problems installing MySQL for T/Mon SQL Agent, please contact DPS Telecom Tech Support at 1-800-693-0351.